Showing posts with label Main course. Show all posts

Friday, April 6, 2012

Divine combinations I : Ladies finger and Rasam

There are several combinations when it comes to Indian food. We never cook just one dish alone. Every thing we cook needs to be accompanied by yet another and hence the terms, main dish and side dish. A "thali" consists of several items which are served together and usually they are good combinations. But one cannot have the luxury of cooking or eating the several items served in the thali, unless one wants to eat everyday at the restaurant! So, everyone finds their own divine combinations. Some are complex and some are simple and many are just out of the ordinary (trust me, there are combinations unbelievable!!). Here I present to you one of the most beloved combinations and voted favorite by so many of my friends, Ladies Finger (Okra) fry and Rasam. And the magic lies in keeping the dish as simple as possible to attain the closest mother made taste.

Lets start with the Rasam. Take a vessel and add 2-3 cups of water. Into this, drop some chopped tomatoes, crushed garlic (optional), a pinch of turmeric powder and hing, 2 table spoons of Rasam powder, salt to taste, curry leaves and chopped coriander. If using tamarind paste, then dissolve into this mixture little tamarind paste (depending on taste levels, optimum would be half of as much that goes on a toothbrush :P ), else extract the first juice from grape sized ball of fresh tamarind and add it to the vessel. Finally switch on the heat and let it boil for 5-6 minutes until all the mixture boils. It is essential that the tamarind loses its rawness. Some people would like to add a little cooked lentils into this mixture. Do so at this point, else just remove it from the heat and temper it with mustard and cumin seeds popped in hot melted butter or ghee. 

For the Ladies finger (Okra) fry, chop the okra after removing its crown, into half centimeter pieces or more finely if you prefer. Heat oil in a frying pan and pop some mustard seeds, cumin seeds and broken dry red chillies. Add some broken urad dhal, a pinch of turmeric and some hing. Do not let the red chillies or the urad dhal burn. So, immediately add the cut ladies finger (Okra), sprinkle the necessary salt and allow it to get cooked. If you close the pan, then you end up with cooked Okra. But then, keep if open and reduce the flame heat to medium and keep stirring carefully (from time to time) to obtain nicely fried vegetables.

Pour some hot Rasam over cooked white rice and serve with the fried ladies finger!


Thursday, August 4, 2011

Potato au gratin!


Yo, food blog after a long time! Surprises are good, so I have heard and so I have experienced quite recently. So in celebration of my surprise, I decided to surprise some people with this food blog. I know this sounds lame, nevertheless, let move on to food.

Potatoes are fascinating and probably there are very few people in the world who can hate them. Boiled, fried, grilled, baked or even in the form of vodka, potatoes are everywhere. Almost every guy who starts to cook, especially abroad, makes the traditional urulakezhangu fry (potato fry) and proudly starts his kitchen career. I was no exception. My first in Germany was potato fry and I used the spices available in the German supermarket and was quite proud of my near desi flavour. Years have passed since that first potato fry and lead me this current potato au gratin.

It might not be the traditional au gratin, so people wanting to complain, I already accept this. Nevertheless, here is how I made this tasty yet another poetic potato.

Potatoes-onions-cream-butter-gouda cheese-salt-nutmeg-thyme-basil-pepper.

Select big potatoes (be it any kind) and peel the skin off. Make thin slices and arrange them on a bake proof glassware (or ceramic). Fry onion in butter and spread a layer of fried onion over the potatoes. Arrange potatoes slices again over this. Take 300ml of 30% cream and mix into it salt, powdered nutmeg, thyme, basil and freshly ground black pepper. Pour this evenly all over the potatoes. Add one more layer of fried onions if desired and spread the shredded Gouda cheese over this. Gouda can be substituted with cedar cheese or the common store sold pizza cheese. Pre heat the oven for 10 minutes at 200 C and then bake for 30 minutes with heating from top and bottom.


Monday, November 22, 2010

The love continues, Brinjal: Innovation

Introduction:
Since the last post had a complicated name, I decide to post this without a name! Well, the truth is that I am still trying to name this Brinjal (Aubergine) cuisine. Aubergine is the only vegetable that is always there in my fridge. It is like milk, never runs out. Every market visit will replenish my brinjal stock and I am never bored of eating it! Sometimes it is consecutive days with brinjal since one huge aubergine is too big for me to consume in a single day. Of course this statement is a lie because most of the times, one brinjal is just not enough!
Motivation:
What is a life of a scientist if he does not find something new?! Though the challenges involved in the real time lab are more, I am quite at ease in inventing new food to eat in my part time lab, the kitchen. For almost over a week, I was cooking this dish in my mind with a variety of  combination of spices and finally arrived at two versions out of which I have successfully cooked, sampled and also tested one version. Oh, the second variation will just be sans tomatoes!
Materials and Methods :
Select a good big fleshy aubergine. Make sure it is straight and not twisted into several angles or deeply curved! A good straight aubergine will be easy to bake on the pan for this dish. Two big onions, two juicy tomatoes, green chili to as much hotness as is required, garlic pods, more ginger than the garlic taken, cashew nuts, cloves, cinnamon, anise and cardamom are the sauce makers. Potatoes and carrots will be our second base along with cumin, dhaniya and red chili powder.

Preparation of layer one:
The first layer is the baked aubergine. Cut the aubergine along the length and make thick slices. Thin slices will get over cooked and difficult to handle. Apply little oil on both the sides and put on a hot plate until both the sides are brown and the aubergine gets cooked. Apply salt after it is cooked and keep aside.

Preparation of layer two:
Peel the potatoes and carrots and boil them. Grate them finely after boiled and make into a homogeneous paste. Cooked peas and beans can also be added if one wants more vegetables. In very little hot oil, add the cumin and dhaniya and chili powder and then mix finely with the grated and smashed vegetables. The little oil is only for cooking the spices. Make sure the vegetable paste is mixed well with the spices and salt. Adding more oil will disrupt the nature of the vegetable paste. Exercise a little care while doing this!
Combination of layers:
Spread this vegetable paste over the baked aubergine. Make it also a thick layer, can be as thick as the aubergine is. The easiest way to prepare this will be in individual plates. If you are serving 4 people, then its 4 slices already on 4 plates over which this can be prepared. The handling will be easier. These two layers will serve as base and the sauce can be poured over this.

Cooking the sauce:
This is a time tested sauce. Nothing much to explain here, just the usual. Cook the tomatoes and onions with the garlic, ginger, whole spices (cardamon, cinnamon, anise and cloves), cashews and salt. Transfer to the blender and make a fine paste. Transfer this to the cooking pot and add water to adjust the consistency. A little cheese can be grated into this to make it rich and thick.
Results and discussion: 
Pour the sauce over the layered aubergine and it is now ready to serve! This is by itself a main course but can also be served along with hot white rice. Garnish with cilantro and onions. Too many preparation methods, but then, to create something exotic, it is totally worth doing these.Removing the tomato from the sauce ingredients will lead you to a white sauce which can also be equally delicious!


Thursday, September 23, 2010

Put pressure on the basics, Pongal!

"machi ,here's a blog request machi. hope you are back in shape now and feeling better. since you are still at home, why don't you ask your mom to make pongal and you take pics of that and write a combined blog with your mom!! . i was looking at some recipes online and most of them seem to mess it up like mad. i was thinking of your simple recipe which is super effective. guess these guys don't know what pongal is !!"
                                 - Vivek , 4th September 2010

When I read this mail, I was thinking, how can someone mess up Pongal?! It is one of the easiest traditional breakfast a person can make. Ven Pongal derives its taste and nutritive value from the simple ingredients that go into it and it is best served as a hot steaming breakfast. Even when I am writing this, my visualization takes me to my college canteen where Pongal is served, just the way it should be, with sambar and coconut chutney.

Pongal is one recipe that also depends on "kai manam" or the hand that cooks it. It will taste differently even when cooked with the same ingredients but with a different pair of hands. There is no quantization of the ratios and each person can adapt what his tongue likes. So my recipe is going to be more specific to how I like my pongal and of course which has won the hearts of several people!

Add just one table spoon of ghee (clarified butter) to the pressure cooker. Fry a few cashews until then are golden brown and then add whole black pepper. Add cumin seeds, finely chopped ginger and fresh curry leaves. A pinch of hing and turmeric powder can be added now. Add in 2 cups of rice and half a cup of moong dhal into this and mix well. Add 2 cups of water more than how much the rice will usually consume. That is to say, 8 cups if you use raw rice, 6 cups if you will use basmathi. Add salt and pressure cook until done. Serve with sambar or gotsu and coconut chutney.

After opening the pressure cooker, top up with another spoon on ghee and mix well. Too much of ghee will make the pongal unpalatable and no one wants to sleep right after breakfast! Adding chopped green chili is not advisable at all, it is not pongal anymore! Vary the levels of pepper and ginger to attain different levels of spiciness. Make sure that the rice and lentils get blended well when you cook it. Pongal is smooth, the rice should not be like how is it in vegetable rice. If you are going to make it in an open vessel, then to boiling water, add chopped ginger, black pepper, curry leaves, cumin, hing, turmeric, salt, rice and lentils. Finally when the rice and lentils are cooked, add cashews roasted in a little excess of ghee and mix well. Only in this sequence you will ensure that the rice and lentils gets cooked well. With the pressure cooker, things are different, quick and you can afford to be lazy!

Wednesday, September 1, 2010

The kissable garlic : Aglio oilo


I was making spaghetti for dinner and I told Prashanth and Ramki “machis, tomorrow you are going to eat spaghetti in Italy. So don’t complain there that it is not as good as my preparation!” and that is exactly what happened. Probably it was just my luck that that particular restaurant in Venice did not serve us well, but as soon as Prashanth uttered those words, we could not stop laughing.

Many people would not eat garlic just because it would impart mouth odor and make it difficult to socialize. But when deep fried, garlic does not impose this restriction. And I am a huge fan of garlic! Who cares if the mouth is going to smell, I cannot restrain myself from garlic fried in ghee or when put in rasam. Me and my sister used to fight over who will get the extra garlic after amma has partitioned and rationed it out for us!

Aglio oilo is a basic simple spaghetti recipe that I would term as the kissable garlic. This is one of my most favorite non creamy and non gravy based spaghetti that can be enjoyed for its pure flavor of garlic and chili without interference from oregano or any other expressive seasoning. I love the olive oily feeling all around my mouth when I eat this.

Heat just a little excess of good olive oil in a pan. Fry finely chopped garlic until it is fried well. Add coarsely ground deseeded green chili paste into this. Toss in a few pieces of red bell pepper or minced celery or both. The red bell pepper and celery are just very optional for people who like some extra vegetables in their plate. Now add the well cooked and strained spaghetti into this and stir. Add salt and sprinkle just a dash of black pepper powder. Mix well so that every spaghetti strand is bathed in olive oil and the garlic pieces are spread well into them. Serve hot with an optional garnish of grated or powdered cheese.

Note: Add at least 5-6 huge pods of garlic. Chop it as finely as possible, but don’t make a paste out of it. Chili can be added as per your levels. 2-3 should be optimum.


Tuesday, August 31, 2010

Pure Polish, Pierogi


Discovering new food for my tongue is always the exciting part of every tour I make and I take time to sit on the internet just to do research on the traditional food and find out the vegetarian options available. Before my trip to Krakow, Poland, I could interact with two Polish friends who guided me to Polish food that I have eventually fallen in love with. I was blessed in two ways. One, I could find out the exact restaurant they suggested and they served awesome Peirogi and two, I was able to relish proper home made Peirogi prepared in the traditional way. When I first told my friends that I ate Pierogi with potato fillings they stuck their tongue out and mocked that it was Ruskie and not traditional and then when I told them about the sauerkraut filling, they accepted me into the league of Pierogi lovers.

Pierogi is the first Polish fascination I am going to write about and then later follow this up with another wonder as soon as I cook it. The day I ate Pierogi, it was Vinayakar chaturthi and it felt like I was not missing the kozhakattais. Well, this is a very crude comparison just with respect to how it looks! Then when I described it to amma, she reminded me of the Chinese kozhakatais (well, she invented this name) she used to make. But yet again it would be blasphemous to compare Pierogi with this, even though the outer layer is the same. And oh, this is the egg less version!

First a dough needs to be made with all purpose flour. Make the dough with dilute milk, salt and a small pinch of sugar. Egg lovers can add in one yellow into this and Vegans can just ignore it and proceed. Once the dough is made, make small Chapattis with it, 3 inches in diameter. Thanks to Amma and sister for this effort for without them my Pierogis would have lost shape!

Be creative with the fillings. But here is the traditional one. Saute sauerkraut (a separate blog is coming up on this), finely chopped onions and finely chopped mushrooms. Use very little oil to sauté them and add some cumin seeds and a dash of pepper after all these vegetables have been added. Cook them well and add salt, take off the flame and then add finely grated cheese. Mix well. The cheese will melt mildly and make the filling thick. You can ignore the cheese and substitute the sauerkraut with finely shredded cabbage. Alternatively you can play around with smashed potatoes and cheese or blue berries and strawberries!

Now place a spoon of this filling in the middle of the 3 inch Chapattis and close it and seal the edges properly. Do not over stuff it, but make it in such a way that it is full and fat and properly sealed. Drop these into hot boiling water in batches and carefully cook them. Melt butter in a skillet and sauté these boiled Pierogis in this. Do not fry them too deeply but just until you start to see the fry patterns appearing. Garnish with roasted onions!


Sunday, August 15, 2010

Flowery delight: Cauliflower manchurian a.k.a Manjaree

Here is yet another dish that held my fantasy for a long time. Amma forbade ordering this in the restaurants because she feared that they would be too lazy to clean the cauliflower and the food might contain worms. Every time amma used to make cauli, she would remove those slimy squiggly green fellows and so very rarely ordered gobi manchurian (gm). I consider this gm as the finest collobration between India and China.

My college canteen spoiled me with this dish. We used to call it Manjaree. "Anna, one plate manjaree. Ozhunga parthu samachaduthanae? (properly cooked right?)" used to be our order line every time. Ramamurthy mama would always give a friendly tap for this question and assure us that he would bear the medical expenses if anything happened to us because of his food. Nothing has ever happened!

Gm could be a dry starter or made into a gravy to accompany fried rice or fulkas (my fav combos) and other combinations will also be fabulous anyways! Combinations are a seperate blog and I know so many people, including me, relishing certain combos that could be just un thinkable!

Cut the cauliflower into nice florets, wash them well and dry. Cut onions, capsicum and green chili into big pieces. Separate the onion as big leaves after it is cut. Sprinkle vinegar over this onion-capsicum-green chili mixture and set aside. Make a thin batter with all purpose flour adding along coriander powder, cumin powder, red chili powder, ginger garlic paste and salt. Don't make the batter as thick as for making bajji or pakodas. Make it in such a consistency that it will coat your cauliflower and not create an envelope for it. Dip the cauliflower florets into this batter and fry them crisp. Set aside and seriously fight the temptation to eat them before the procedure is complete!

Fry finely chopped onions with ginger and garlic pieces in little oil. Add chili sauce and soy sauce into this. You can additionally add sweet-sour sauce too and I usually substitute the chili sauce with the Thai version of seasoned red chili vinegar called Sambal Olek ( thanks to Sharan for introducing me to it ). Now add the marinated onion-capsicum-green chili after draining the excess vinegar off into this and give it a stir. Add the fried cauliflower florets and toss your pan a couple of times to aid good mixing. Now add finely chopped spring onions and toss again. If you are not comfortable with tossing, then carefully stir to mix well. The dry manchurian is ready!

To make the gravy version, we need not do the marination step. Instead these cut vegetables can be added before adding the sauces and cooked along. Once the sauces are added, add water and cook on low heat. Starch solution or corn flour solution can be added to thicken the gravy. When the gravy is thick, add the fried florets and simmer for a few minutes before garnishing with coriander leaves.

My personal advise, dry version is the best! If you notices, Gm does not contain any garam masala though you can experiment sprinkling some. The sauces play the most crucial role in bringing out the Chinese taste. Also, carefully add salt to this dish because the sauces will already contain salt.


Wednesday, August 4, 2010

My first Italian love, vegetarian Bolognese

I didnt know the difference between Spaghetti, Pasta, Penne, Macaroni, Linguine and Noodles. Yeah, the first time I made noodles by boiling it and adding the pre packaged masala, I thought I made spaghetti and it was Italian. And then my knowledge bank grew and learnt the noodles is Chinese! And when I first ate spaghetti, I thought it was a modified version of the Chinese noodles. Years have passed and I have matured!

I landed in Germany on a Wednesday and it was pommes (french fries) day in my mensa (canteen). Come the first Monday and I asked the serving lady (Frau Fidan Batman) what was the menu for vegetarians and she told me that they have spaghetti with vegetarian variant of Bolognese sauce. Though it looked suspicious to me at first, I trusted the dear old lady and took it and she served it to me with a topping of powdered cheese. I never knew how to eat it and spilled quite some on my shirt and felt embarrassed about it and after coming to lab, I googled on how to eat spaghetti with the fork and spoon! I fell in love with this bolognese the very first time and asked the Germans what their version contained. It was minced meat and then I went to the canteen people and asked them about my bolognese and they assured me that it was just vegetables! 

As a curious connoisseur, I always want to cook what I relish and after years, I ventured into cooking Italian masterpieces and the first one was Bolognese. It originated in the beautiful city of Bologna in Italy and is listed as the most favourable and delicious spaghetti topping. I had a hard time finding the right recipe and so I went to the Italian restaurant near my house and found out from the chef his secret. The funny part was that, I did not eat in that restaurant. It is a heavy budget one for a student and so I told them that it is just to satisfy my curiosity and they bought it looking at my innocent face!

Finely mince carrots, mushrooms, onions and celery. The finer your cut them, the better the sauce will be. Heat olive oil and add the cut vegetables into them, all at one go. When they are sauted well, add little concentrated tomato paste and mix. This is the right time to add salt and freshly grounded pepper and a sprinkle of nutmeg powder. Stir and add 150ml of dry white wine and allow it to boil until the wine nearly evaporates. Now add in as much of tomato puree you want to and cook for at least 30 minutes on low heat.
Traditionally this sauce does not contain oregano, but a little flavour will not harm it. Italian prefer this with pasta, but I prefer this with spaghetti and garnished with generous amounts of cheese!

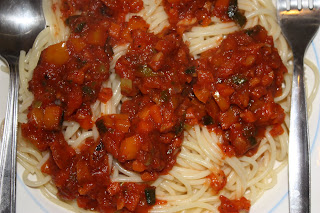
This is a picture of my first bolognese preparation. Appa was the first to taste it here in Germany! I am going to cook it tomorrow and will post the updated one soon!


Tuesday, August 3, 2010

I bow down to the almighty : Thachi mammu a.k.a curd rice !

Throw money around, make the impossible happen, pull strings and work through connections or just hire the best cook or even better, go to the best restaurant. All these are going to make special things simple. Life is not always about how special things are made simple, it is about how simple things are made special. The curd rice stands unmatched in simplicity and it is also the uncut stone waiting to be sculptured into the most glamorous statue.

Good food always brings happiness and a for meal to be complete, it must end with the curd rice. Hail south Indians for this practice! Well cooked rice is mixed with curd with a dash of salt. Simple, quick and needs no brilliance. Best suited for hot afternoons and the best way to experience your favorite pickle or the left over vatha kuzhambu or the sambar. Countless times my curd rice volcano has been filled with hot vatha kuzhambu and it erupts as fulfillment with every mouth and countless times I have had curd rice only for the reason that I cannot miss the pickle.

There are days when I come home from lab and need something special and at the same time traditional and packable for next days lunch. What could be better than making some special curd rice and letting the milk that has been added with the curd to curdle along with the juices of green chili and ginger imbued within? This is exactly what I mean by making simple things special. I remember that when I once wanted to order special curd rice in the restaurant, Appa was totally against it. He said that if I wanted to eat curd rice, I should have had it home! Agreed, but sometimes you never know where temptations originate from!

Basmathi rice has become an integral part of my life here. It was easy for me to buy it in the German supermarkets and cheaper as 5 Kg bags in the Srilankan stores. And being a student when I get Basmathi at 11 E against 15 E for our normal rice, why would I say no?! And using basmathi to make this curd rice is like using a 100 % pure solvent for my experiments! After cooking it with a little extra amount of water to make it more soft, I pop mustard seeds in oil, roast channa dhal, urad dhal, curry leaves, green chili and minced ginger and add this into the rice. I follow this order because I want my curry leaves to be crisp but at the same time I don't want green chili and ginger to be fried. After sprinkling salt, I allow it to get cooled for a few minutes before pouring in chilled milk. Never the 1.5 % low fat or skimmed stuff. No compromise no taste, no, definitely not in this! So the best milk goes into this. Then the curd. I make sure I have stock of curd from the Turkish shops when I want to make this. The Turkish curd tastes exactly like "aathu tachi" (home made curd) and gives me a sense of home. Finely chopped dhaniya leaves/stems also go into this and when I mix this, I make sure the green chili and ginger gets crushed and the juices are out. 

Want this extra special?! Sprinkle shredded coconut, carrot, cucumber, raw mango pieces, raisins and pomegranate . Will the glamorous statue say NO to ornaments?!

Monday, June 21, 2010

The rainbow re-creation, Bisi bela bath

When you are young and when it was raining and sunny, your parents would have showed you the rainbow. Every kid will ask about it and parents and picture book will give an enchanting reply. Marriage between the clouds and the earth, elves with pots of gold and the likes. Everything will make the rainbow more fascinating and make it a divine experience whenever you look at it. Then, when you grow up, your science book will reveal the truth about the rainbow's occurrence and the physics behind it. Though you now realize the blatant science behind it, it is always fascinating. 

For me, the Bisi bela bath presented something similar. The most popular food in Karnataka, in my house, it was my mothers rainbow. The aroma that filled the house when she was cooking it would increase your appetite several folds. On a chill rainy day, there can be nothing better than the hot Bisi bela bath, served with roasted potatoes or onion raita or fried applam. Initially it was my mothers secret recipe that made it mysterious. It was a secret at that time, because I would not understand it. The mystery surrounding the aroma and the taste made us look forward to devour it when presented at occasions. And then, after so many years of comfortably eating it, situations forced me to grow up and ask her the recipe for it.

Cinnamon, she said. The magic, the flavor, the key is good cinnamon. Cinnamon with the bark still on, not the processed glazed ones or the powder or the flavoring. It weaves the aromatic thread that links together the rice, lentils and the vegetables.

I cooked this following the instructions from my mother. The only improvisation I made was the method of cooking it. I cooked 2 measures of rice with a little more than half a measure of toor dhal in a pressure cooker and set it aside. Then I dry roasted mustard seeds, very little fenugreek seeds, red chili, jeera, channa dhal,  poppy seeds, coriander seeds, cinnamon and scrapped coconut. I also few cloves and just one cardamom to this. Then I coarsely  grounded this. After heating oil in a pan, I added chopped green chili, onion cut not into very small pieces, small onions, diced carrots and potatoes, cut beans and lots of green peas. Turmeric, cumin powder, coriander powder, hing and of course salt went into this. Adding water I cooked it until 70 % done and then added the coarsely grounded spices. This is the point when you will feel your feet are actually above the ground. I made this with extra water in it and cooked the spices along with the vegetables and finally transferred this into the pressure cooker, added ghee and thoroughly mixed it with the cooked rice and dhal. The rice and dhal mixture will absorb the water well, so it is okay to have extra water and even if water is a bit excess, the bisi bela bath will still be wonderful. Final garnishing was as usual with coriander leaves.

I felt I had just re created the rainbow myself!