Thursday, August 4, 2011

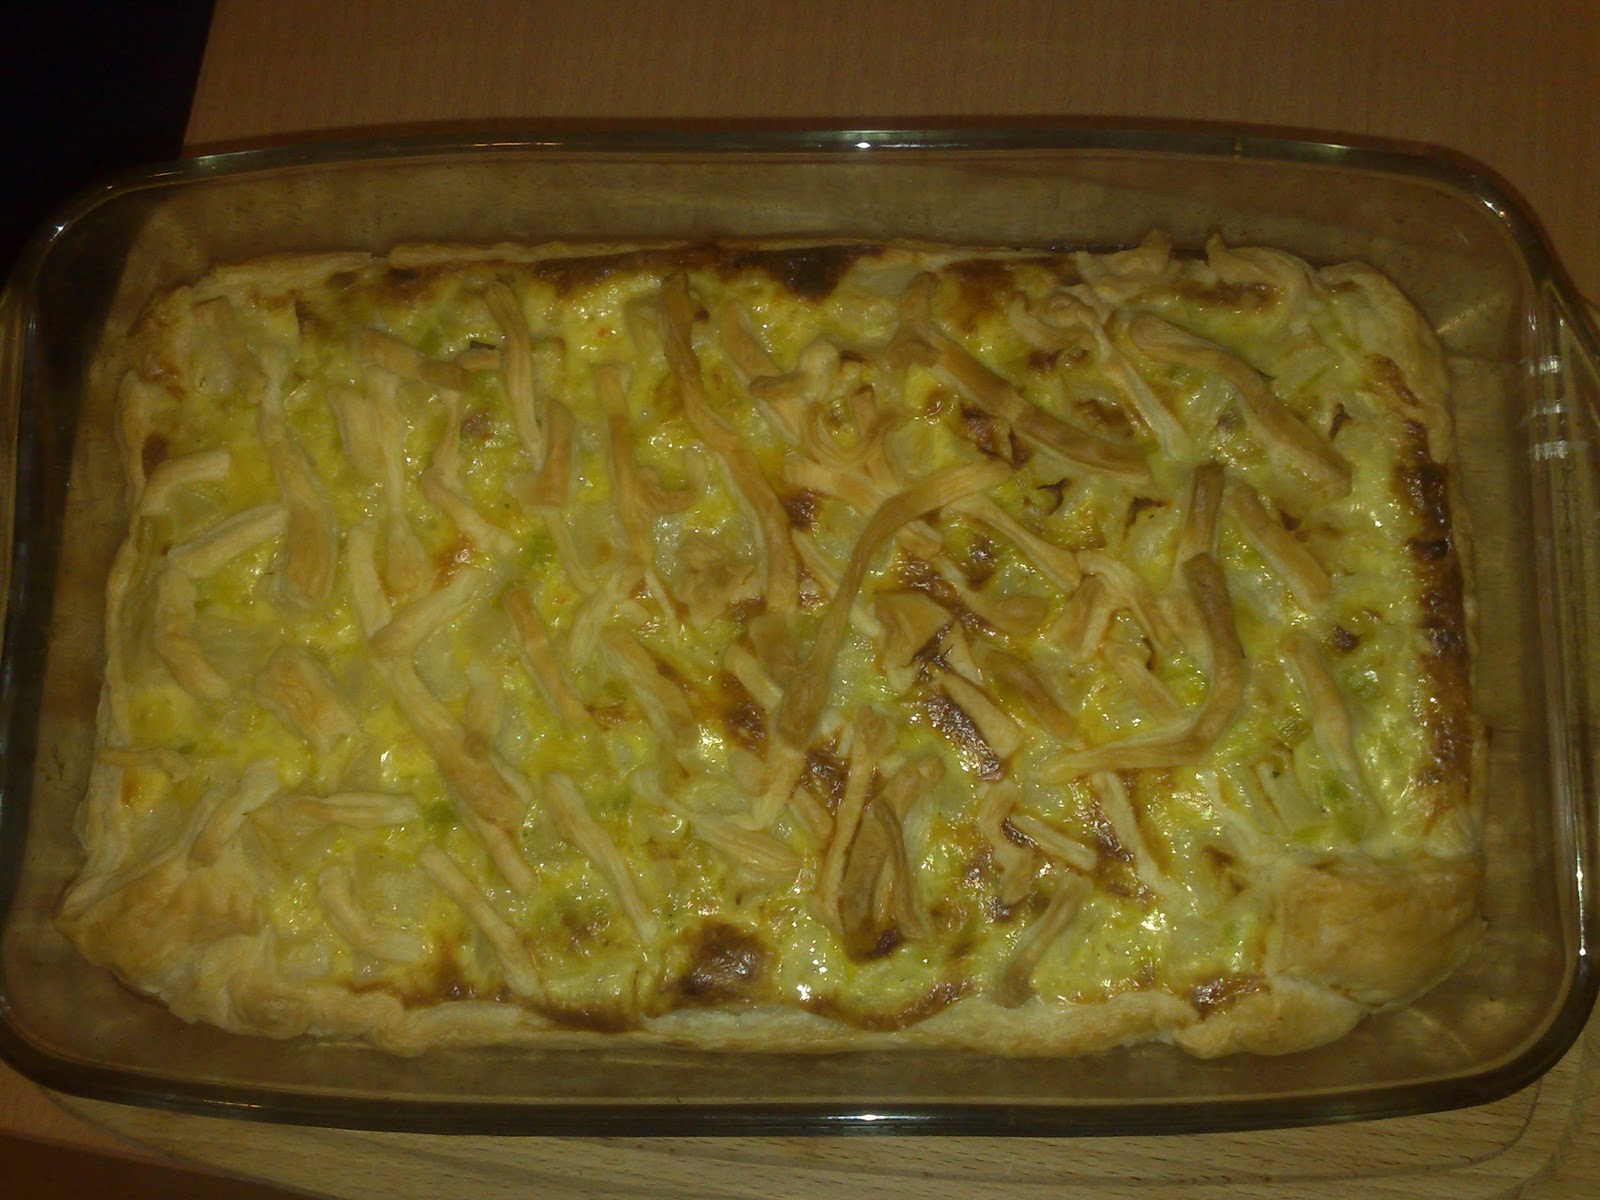
Potato au gratin!


Yo, food blog after a long time! Surprises are good, so I have heard and so I have experienced quite recently. So in celebration of my surprise, I decided to surprise some people with this food blog. I know this sounds lame, nevertheless, let move on to food.

Potatoes are fascinating and probably there are very few people in the world who can hate them. Boiled, fried, grilled, baked or even in the form of vodka, potatoes are everywhere. Almost every guy who starts to cook, especially abroad, makes the traditional urulakezhangu fry (potato fry) and proudly starts his kitchen career. I was no exception. My first in Germany was potato fry and I used the spices available in the German supermarket and was quite proud of my near desi flavour. Years have passed since that first potato fry and lead me this current potato au gratin.

It might not be the traditional au gratin, so people wanting to complain, I already accept this. Nevertheless, here is how I made this tasty yet another poetic potato.

Potatoes-onions-cream-butter-gouda cheese-salt-nutmeg-thyme-basil-pepper.

Select big potatoes (be it any kind) and peel the skin off. Make thin slices and arrange them on a bake proof glassware (or ceramic). Fry onion in butter and spread a layer of fried onion over the potatoes. Arrange potatoes slices again over this. Take 300ml of 30% cream and mix into it salt, powdered nutmeg, thyme, basil and freshly ground black pepper. Pour this evenly all over the potatoes. Add one more layer of fried onions if desired and spread the shredded Gouda cheese over this. Gouda can be substituted with cedar cheese or the common store sold pizza cheese. Pre heat the oven for 10 minutes at 200 C and then bake for 30 minutes with heating from top and bottom.


Wednesday, November 24, 2010

Basic bakes, the YMCA cake!

Trips down the memory lane are frequent and things that cause these trips are sometimes as simple as a folded piece of paper or a distant sound of a train engine or as in this case, a cake. My Heinemann blog would have already revealed how much I like cakes and how much I want to learn baking, and now I am getting this opportunity to keep small steps into the world of baking. Thanks to my friend!

She did not tell me what we would be baking, but we bought the ingredients. Flour, sugar, vanilla sugar, raisins, sweetened orange peels, sliced and broken almonds, plant margarine and eggs. May be an expert baker can already guess the outcome and the look and the taste, but I couldnt. I was just eager to learn my first cake. And even when it was out from the oven, I did not recognize it until we cut it. Voila!! I was the six year old kid again. When I held the cake in my hands and sank my teeth into the grainy soft nutty mid section of this aromatic piece of nostalgia, I was not in Germany, but I was in YMCA. Wearing white shorts and a white shirt and after an hour long of gymnastic lessons with master Ismail, dad used to take me to the tea shop that stood near the bike parking. A simple tea shop with "Goldspot, the zing thing" scribbled all across and cartons of "Fruti" hanging in the windows and glass canisters filled with biscuits and cakes. They had these cakes and dad always used to buy this for me. One cup of tea. And they used to serve tea in a cup and saucer those days!

Separate the white from the yellow from 8 large eggs. Into the yellows, add 300 g of powdered sugar and whisk well until the sugar dissolves. Beat the egg whites until it is fluffy (until it does not fall down when you invert the bowl) and then fold the whites slowly into the well beaten yellow. Now add in 400 g of flour (Type 405) slowly with constant stirring. The resultant will be a thick batter, not a dough. Now goes in 10g of vanilla sugar for the mild flavor, 100 g raisins, 100 g sweetened orange peels and 100 g of the almonds. Mix well into the batter and then pour this into a nice oven able tray. Pre heat the oven at 200 C for 10 minutes and then bake this at 180 C for 90 minutes. Well, the time of baking depends on the efficiency of your oven. So it is a good idea to check if the cake is done after 60 minutes by driving a knife into the center and if the knife comes out without sticky batter, it is done! Dont worry if the top will become a bit black, you can always scrap it off and restore the baked brownness! Allow it to cool and then serve as slices. This cake can be stored for more than a week!

People who are baking egg less could find an alternative and post it to me ;-)


Monday, November 22, 2010

The love continues, Brinjal: Innovation

Introduction:
Since the last post had a complicated name, I decide to post this without a name! Well, the truth is that I am still trying to name this Brinjal (Aubergine) cuisine. Aubergine is the only vegetable that is always there in my fridge. It is like milk, never runs out. Every market visit will replenish my brinjal stock and I am never bored of eating it! Sometimes it is consecutive days with brinjal since one huge aubergine is too big for me to consume in a single day. Of course this statement is a lie because most of the times, one brinjal is just not enough!
Motivation:
What is a life of a scientist if he does not find something new?! Though the challenges involved in the real time lab are more, I am quite at ease in inventing new food to eat in my part time lab, the kitchen. For almost over a week, I was cooking this dish in my mind with a variety of  combination of spices and finally arrived at two versions out of which I have successfully cooked, sampled and also tested one version. Oh, the second variation will just be sans tomatoes!
Materials and Methods :
Select a good big fleshy aubergine. Make sure it is straight and not twisted into several angles or deeply curved! A good straight aubergine will be easy to bake on the pan for this dish. Two big onions, two juicy tomatoes, green chili to as much hotness as is required, garlic pods, more ginger than the garlic taken, cashew nuts, cloves, cinnamon, anise and cardamom are the sauce makers. Potatoes and carrots will be our second base along with cumin, dhaniya and red chili powder.

Preparation of layer one:
The first layer is the baked aubergine. Cut the aubergine along the length and make thick slices. Thin slices will get over cooked and difficult to handle. Apply little oil on both the sides and put on a hot plate until both the sides are brown and the aubergine gets cooked. Apply salt after it is cooked and keep aside.

Preparation of layer two:
Peel the potatoes and carrots and boil them. Grate them finely after boiled and make into a homogeneous paste. Cooked peas and beans can also be added if one wants more vegetables. In very little hot oil, add the cumin and dhaniya and chili powder and then mix finely with the grated and smashed vegetables. The little oil is only for cooking the spices. Make sure the vegetable paste is mixed well with the spices and salt. Adding more oil will disrupt the nature of the vegetable paste. Exercise a little care while doing this!
Combination of layers:
Spread this vegetable paste over the baked aubergine. Make it also a thick layer, can be as thick as the aubergine is. The easiest way to prepare this will be in individual plates. If you are serving 4 people, then its 4 slices already on 4 plates over which this can be prepared. The handling will be easier. These two layers will serve as base and the sauce can be poured over this.

Cooking the sauce:
This is a time tested sauce. Nothing much to explain here, just the usual. Cook the tomatoes and onions with the garlic, ginger, whole spices (cardamon, cinnamon, anise and cloves), cashews and salt. Transfer to the blender and make a fine paste. Transfer this to the cooking pot and add water to adjust the consistency. A little cheese can be grated into this to make it rich and thick.
Results and discussion: 
Pour the sauce over the layered aubergine and it is now ready to serve! This is by itself a main course but can also be served along with hot white rice. Garnish with cilantro and onions. Too many preparation methods, but then, to create something exotic, it is totally worth doing these.Removing the tomato from the sauce ingredients will lead you to a white sauce which can also be equally delicious!


Thursday, November 18, 2010

Zakąska Agnieszki !

Ok, first things first. Let us deal with the pronunciation of the dish. ZA-KAUN-SKA. It sounds complicated, but it is not so complicated to make if you are a gifted baker or as in my case, a gifted observer! Yeah, I am playing the part of the student with this dish and it is from the Polish cuisine. Agnieszki in the name of this dish stands for the innovation and the modification introduced by the person cooking, Agnieszka. At this very moment she is cooking it and I am writing this. ( Wednesday, 17.11.2010, 20:00 )


Wash the leeks (2) and discard the hard green part. Cut into round slices the rest of the onion. Peel the celery (1) and cut in into nice 1 inch cubes. Add these together into boiling water and add along one table spoon  of butter, some salt and 2 spoons of sugar. Within few minutes, the room is filled with the magnificent smell of onions and celery. Celery, by far, has the most interesting smell for a vegetable that I have ever come across! Once the celery is 70 % cooked, take it off the heat. Strain the water off and transfer the boiled vegetables to a hot pan with melted butter (1 spoon). Now add two cubes of vegetable stock and cook until the stock is spread over the vegetables. The cubes are actually well concentrated vegetable stock containing vegetables and spices like thyme, rosemary and turmeric and salt. One good idea to substitute this would be to use the readily available Knorr veg clear soup powder (oh yeah, EUREKA!).


Pour nearly 150ml of cooking cream (25-30 % fat, thick) over the prepared vegetables and mix evenly. Now, into a nice glass oven able bowl, spread a layer of French pastry (yet again readily available) so that the pastry lines the base and the sides of the bowl. Prick the bottom with a fork so that the pastry can breathe when in the oven! Transfer the vegetable-cream mixture into this and cover the top with strips of the pastry in random or netted orientations. Pre-heat the oven to 180 Celsius and then put this inside for 40 minutes (@ 180 degrees ). Allow to cool for a few minutes before serving. Play around with spices if you need to make it hotter! 


Oh, the taste is divine. Leeks and celery and cream with mild spices. The taste will transport you to the nostalgic 1800's of Europe. The ingredients might be tough to procure in India, but I know that people reading this will add their names to the second part for their own modification introduced! 

Tuesday, November 16, 2010

The Brinjal lover, Dahi Bhaingan

I welcome myself back to the blog after quite a while! It is becoming like "seasons". One blogging season with lots of posts and then a break and then a surprise post like this one and the season will start again. And what is better than to start again with my favorite Brinjal (kathirikai, aubergine, bhaingan). It is quite a story with me and brinjal, because, during childhood I used to hate this vegetable. Now, I have cravings for brinjal and I love it in every way possible. Cooked, grilled, baked, sambar, rasam, chutney, in pizza, in lasagna or with rice, brinjal is magic! Here is one recipe that I fell in love with and learnt from my friend from Orissa.

Choose a big brinjal, the ones that are usually grilled. Cut into round sliced. Dont make too thin slices, make them juicy. A little less than half a centimeter thickness would be really good. In a plate, mix together some red chili powder, turmeric, salt and oil. Coat both sides of the slices of brinjal well with this mixture and keep aside for a few minutes. In the meanwhile, heat a pan without oil. Place the brinjal slices on the hot pan (or plate) and cook. Turn the slices until both the sides are roasted. The brinjal should be roasted cooked but not smashed. Stack the cooked slices away until the gravy is done.

Heat a little oil in a pan and add panch puran. This is a mixture of five spices, fennel seeds, fenugreek seeds, cumin, black til seeds and onion seeds. Chopped green chili (4-5), minced ginger, chopped garlic (3-4) and curry leaves follow. Add some cumin and dhaniya powder and some hing. Switch to low heat and add well beaten curd (yogurt) and stir well. Immediately in sometime add the prepared brinjal slices and cook for few minutes on low heat. Control the salt in the yogurt if needed. 

This can be garnished with chopped cilantro and served with hot white rice. Cooking the brinjals in this way will take extra time and gas, but trust me, the effort is totally worth it. It is not spicy, but it can be made hot with the amount of green chili that goes in the yogurt. Keep the red chili powder over the brinjal to minimum because when you are cooking this on the hot plate, it could make the environment in the kitchen uncomfortable!


Tuesday, September 28, 2010

The taste of nature, Palak Paneer

There should be something that comes close to how Nature would taste. Well, people would suggest to eat raw vegetables or eat a carrot that has just been dug up from earth seconds ago. Agreed. But then, there should also be something that will taste as fresh as nature even after cooking. Words are lost in translation and similarly, flavors are lost during cooking. The final palatable dish is a conjuncture of new flavors and not the initial and most of the times we never complain, because that is what we want! Palak Paneer is one subtle item where you want the initial flavor to remain and not get a different modified taste. When you eat a mouth full of palak paneer, you should realize the taste of "green" and the taste of "milk" and there should be nothing else gaudy. There should be no oil oozing out, there should be no spice dominance, it should be green, lush and smooth.
Too many rules eh?! The fascinating fact about cooking palak paneer is, just keep the procedure simple to attain the best result. There is no strain, no hurry. But there needs to be the willingness to get it right.A little science, frying in oil will result in change in flavor and color. And a little irony, oil has to be used anyways!

Clean the fresh palak leaves (Blatt spinat in German) and remove the thick stems. Boil water in a huge vessel and add the uncut leaves to it (remember, add only when the water is boiling). The leaves will get cooked in just over 3 minutes. Drain the water and transfer the cooked leaves to a blender. Don't start blending yet.
Heat just a tablespoon of oil in a pan and saute finely chopped onions, just one small garlic and a similarly sized ginger. Add chopped green chili to this if a little hotness is required. Once the onions are sublime, transfer the contents to the blender and blend along with the spinach to a very fine smooth consistency. Keep aside.

To a cup of water, add cumin powder, coriander powder, a little red chili powder and a drop of turmeric. Mix well, keep it watery and not make into a paste. Heat a little more than half a teaspoon of oil in a pan. Add into it broken cloves(2), slit cardamom(2) and very little cinnamon. Now add the cumin+coriander+chili water into this and allow to cook on medium heat. Add some hand crushed dried kasoori methi (fenugreek) to this. Now transfer the blended spinach mixture into this, wash the blender with little milk to transfer the still sticking spinach. Never increase the heat beyond medium, the slower the cooking, the better. Add fresh cubes of paneer (cottage cheese) into this and allow simmer for a few minutes before taking it off the heat.

More than the do's, there are many do not's in cooking this! Well, experimentalists can always ignore these, but a perfectionist can appreciate. Do not add fried paneer cubes. Do not fry the spice powders directly in oil. Do not use more than few pieces of whole spices. Do not over load garlic. Do not add cashews and raisins. Do not add mint leaves and tomatoes. Oh, and in case I have failed to mention, palak paneer should be green!

Thursday, September 23, 2010

Put pressure on the basics, Pongal!

"machi ,here's a blog request machi. hope you are back in shape now and feeling better. since you are still at home, why don't you ask your mom to make pongal and you take pics of that and write a combined blog with your mom!! . i was looking at some recipes online and most of them seem to mess it up like mad. i was thinking of your simple recipe which is super effective. guess these guys don't know what pongal is !!"
                                 - Vivek , 4th September 2010

When I read this mail, I was thinking, how can someone mess up Pongal?! It is one of the easiest traditional breakfast a person can make. Ven Pongal derives its taste and nutritive value from the simple ingredients that go into it and it is best served as a hot steaming breakfast. Even when I am writing this, my visualization takes me to my college canteen where Pongal is served, just the way it should be, with sambar and coconut chutney.

Pongal is one recipe that also depends on "kai manam" or the hand that cooks it. It will taste differently even when cooked with the same ingredients but with a different pair of hands. There is no quantization of the ratios and each person can adapt what his tongue likes. So my recipe is going to be more specific to how I like my pongal and of course which has won the hearts of several people!

Add just one table spoon of ghee (clarified butter) to the pressure cooker. Fry a few cashews until then are golden brown and then add whole black pepper. Add cumin seeds, finely chopped ginger and fresh curry leaves. A pinch of hing and turmeric powder can be added now. Add in 2 cups of rice and half a cup of moong dhal into this and mix well. Add 2 cups of water more than how much the rice will usually consume. That is to say, 8 cups if you use raw rice, 6 cups if you will use basmathi. Add salt and pressure cook until done. Serve with sambar or gotsu and coconut chutney.

After opening the pressure cooker, top up with another spoon on ghee and mix well. Too much of ghee will make the pongal unpalatable and no one wants to sleep right after breakfast! Adding chopped green chili is not advisable at all, it is not pongal anymore! Vary the levels of pepper and ginger to attain different levels of spiciness. Make sure that the rice and lentils get blended well when you cook it. Pongal is smooth, the rice should not be like how is it in vegetable rice. If you are going to make it in an open vessel, then to boiling water, add chopped ginger, black pepper, curry leaves, cumin, hing, turmeric, salt, rice and lentils. Finally when the rice and lentils are cooked, add cashews roasted in a little excess of ghee and mix well. Only in this sequence you will ensure that the rice and lentils gets cooked well. With the pressure cooker, things are different, quick and you can afford to be lazy!