Wednesday, November 24, 2010

Basic bakes, the YMCA cake!

Trips down the memory lane are frequent and things that cause these trips are sometimes as simple as a folded piece of paper or a distant sound of a train engine or as in this case, a cake. My Heinemann blog would have already revealed how much I like cakes and how much I want to learn baking, and now I am getting this opportunity to keep small steps into the world of baking. Thanks to my friend!

She did not tell me what we would be baking, but we bought the ingredients. Flour, sugar, vanilla sugar, raisins, sweetened orange peels, sliced and broken almonds, plant margarine and eggs. May be an expert baker can already guess the outcome and the look and the taste, but I couldnt. I was just eager to learn my first cake. And even when it was out from the oven, I did not recognize it until we cut it. Voila!! I was the six year old kid again. When I held the cake in my hands and sank my teeth into the grainy soft nutty mid section of this aromatic piece of nostalgia, I was not in Germany, but I was in YMCA. Wearing white shorts and a white shirt and after an hour long of gymnastic lessons with master Ismail, dad used to take me to the tea shop that stood near the bike parking. A simple tea shop with "Goldspot, the zing thing" scribbled all across and cartons of "Fruti" hanging in the windows and glass canisters filled with biscuits and cakes. They had these cakes and dad always used to buy this for me. One cup of tea. And they used to serve tea in a cup and saucer those days!

Separate the white from the yellow from 8 large eggs. Into the yellows, add 300 g of powdered sugar and whisk well until the sugar dissolves. Beat the egg whites until it is fluffy (until it does not fall down when you invert the bowl) and then fold the whites slowly into the well beaten yellow. Now add in 400 g of flour (Type 405) slowly with constant stirring. The resultant will be a thick batter, not a dough. Now goes in 10g of vanilla sugar for the mild flavor, 100 g raisins, 100 g sweetened orange peels and 100 g of the almonds. Mix well into the batter and then pour this into a nice oven able tray. Pre heat the oven at 200 C for 10 minutes and then bake this at 180 C for 90 minutes. Well, the time of baking depends on the efficiency of your oven. So it is a good idea to check if the cake is done after 60 minutes by driving a knife into the center and if the knife comes out without sticky batter, it is done! Dont worry if the top will become a bit black, you can always scrap it off and restore the baked brownness! Allow it to cool and then serve as slices. This cake can be stored for more than a week!

People who are baking egg less could find an alternative and post it to me ;-)


Monday, November 22, 2010

The love continues, Brinjal: Innovation

Introduction:
Since the last post had a complicated name, I decide to post this without a name! Well, the truth is that I am still trying to name this Brinjal (Aubergine) cuisine. Aubergine is the only vegetable that is always there in my fridge. It is like milk, never runs out. Every market visit will replenish my brinjal stock and I am never bored of eating it! Sometimes it is consecutive days with brinjal since one huge aubergine is too big for me to consume in a single day. Of course this statement is a lie because most of the times, one brinjal is just not enough!
Motivation:
What is a life of a scientist if he does not find something new?! Though the challenges involved in the real time lab are more, I am quite at ease in inventing new food to eat in my part time lab, the kitchen. For almost over a week, I was cooking this dish in my mind with a variety of  combination of spices and finally arrived at two versions out of which I have successfully cooked, sampled and also tested one version. Oh, the second variation will just be sans tomatoes!
Materials and Methods :
Select a good big fleshy aubergine. Make sure it is straight and not twisted into several angles or deeply curved! A good straight aubergine will be easy to bake on the pan for this dish. Two big onions, two juicy tomatoes, green chili to as much hotness as is required, garlic pods, more ginger than the garlic taken, cashew nuts, cloves, cinnamon, anise and cardamom are the sauce makers. Potatoes and carrots will be our second base along with cumin, dhaniya and red chili powder.

Preparation of layer one:
The first layer is the baked aubergine. Cut the aubergine along the length and make thick slices. Thin slices will get over cooked and difficult to handle. Apply little oil on both the sides and put on a hot plate until both the sides are brown and the aubergine gets cooked. Apply salt after it is cooked and keep aside.

Preparation of layer two:
Peel the potatoes and carrots and boil them. Grate them finely after boiled and make into a homogeneous paste. Cooked peas and beans can also be added if one wants more vegetables. In very little hot oil, add the cumin and dhaniya and chili powder and then mix finely with the grated and smashed vegetables. The little oil is only for cooking the spices. Make sure the vegetable paste is mixed well with the spices and salt. Adding more oil will disrupt the nature of the vegetable paste. Exercise a little care while doing this!
Combination of layers:
Spread this vegetable paste over the baked aubergine. Make it also a thick layer, can be as thick as the aubergine is. The easiest way to prepare this will be in individual plates. If you are serving 4 people, then its 4 slices already on 4 plates over which this can be prepared. The handling will be easier. These two layers will serve as base and the sauce can be poured over this.

Cooking the sauce:
This is a time tested sauce. Nothing much to explain here, just the usual. Cook the tomatoes and onions with the garlic, ginger, whole spices (cardamon, cinnamon, anise and cloves), cashews and salt. Transfer to the blender and make a fine paste. Transfer this to the cooking pot and add water to adjust the consistency. A little cheese can be grated into this to make it rich and thick.
Results and discussion: 
Pour the sauce over the layered aubergine and it is now ready to serve! This is by itself a main course but can also be served along with hot white rice. Garnish with cilantro and onions. Too many preparation methods, but then, to create something exotic, it is totally worth doing these.Removing the tomato from the sauce ingredients will lead you to a white sauce which can also be equally delicious!


Thursday, November 18, 2010

Zakąska Agnieszki !

Ok, first things first. Let us deal with the pronunciation of the dish. ZA-KAUN-SKA. It sounds complicated, but it is not so complicated to make if you are a gifted baker or as in my case, a gifted observer! Yeah, I am playing the part of the student with this dish and it is from the Polish cuisine. Agnieszki in the name of this dish stands for the innovation and the modification introduced by the person cooking, Agnieszka. At this very moment she is cooking it and I am writing this. ( Wednesday, 17.11.2010, 20:00 )


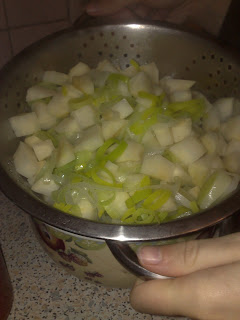
Wash the leeks (2) and discard the hard green part. Cut into round slices the rest of the onion. Peel the celery (1) and cut in into nice 1 inch cubes. Add these together into boiling water and add along one table spoon  of butter, some salt and 2 spoons of sugar. Within few minutes, the room is filled with the magnificent smell of onions and celery. Celery, by far, has the most interesting smell for a vegetable that I have ever come across! Once the celery is 70 % cooked, take it off the heat. Strain the water off and transfer the boiled vegetables to a hot pan with melted butter (1 spoon). Now add two cubes of vegetable stock and cook until the stock is spread over the vegetables. The cubes are actually well concentrated vegetable stock containing vegetables and spices like thyme, rosemary and turmeric and salt. One good idea to substitute this would be to use the readily available Knorr veg clear soup powder (oh yeah, EUREKA!).


Pour nearly 150ml of cooking cream (25-30 % fat, thick) over the prepared vegetables and mix evenly. Now, into a nice glass oven able bowl, spread a layer of French pastry (yet again readily available) so that the pastry lines the base and the sides of the bowl. Prick the bottom with a fork so that the pastry can breathe when in the oven! Transfer the vegetable-cream mixture into this and cover the top with strips of the pastry in random or netted orientations. Pre-heat the oven to 180 Celsius and then put this inside for 40 minutes (@ 180 degrees ). Allow to cool for a few minutes before serving. Play around with spices if you need to make it hotter! 


Oh, the taste is divine. Leeks and celery and cream with mild spices. The taste will transport you to the nostalgic 1800's of Europe. The ingredients might be tough to procure in India, but I know that people reading this will add their names to the second part for their own modification introduced! 

Tuesday, November 16, 2010

The Brinjal lover, Dahi Bhaingan

I welcome myself back to the blog after quite a while! It is becoming like "seasons". One blogging season with lots of posts and then a break and then a surprise post like this one and the season will start again. And what is better than to start again with my favorite Brinjal (kathirikai, aubergine, bhaingan). It is quite a story with me and brinjal, because, during childhood I used to hate this vegetable. Now, I have cravings for brinjal and I love it in every way possible. Cooked, grilled, baked, sambar, rasam, chutney, in pizza, in lasagna or with rice, brinjal is magic! Here is one recipe that I fell in love with and learnt from my friend from Orissa.

Choose a big brinjal, the ones that are usually grilled. Cut into round sliced. Dont make too thin slices, make them juicy. A little less than half a centimeter thickness would be really good. In a plate, mix together some red chili powder, turmeric, salt and oil. Coat both sides of the slices of brinjal well with this mixture and keep aside for a few minutes. In the meanwhile, heat a pan without oil. Place the brinjal slices on the hot pan (or plate) and cook. Turn the slices until both the sides are roasted. The brinjal should be roasted cooked but not smashed. Stack the cooked slices away until the gravy is done.

Heat a little oil in a pan and add panch puran. This is a mixture of five spices, fennel seeds, fenugreek seeds, cumin, black til seeds and onion seeds. Chopped green chili (4-5), minced ginger, chopped garlic (3-4) and curry leaves follow. Add some cumin and dhaniya powder and some hing. Switch to low heat and add well beaten curd (yogurt) and stir well. Immediately in sometime add the prepared brinjal slices and cook for few minutes on low heat. Control the salt in the yogurt if needed. 

This can be garnished with chopped cilantro and served with hot white rice. Cooking the brinjals in this way will take extra time and gas, but trust me, the effort is totally worth it. It is not spicy, but it can be made hot with the amount of green chili that goes in the yogurt. Keep the red chili powder over the brinjal to minimum because when you are cooking this on the hot plate, it could make the environment in the kitchen uncomfortable!


Tuesday, September 28, 2010

The taste of nature, Palak Paneer

There should be something that comes close to how Nature would taste. Well, people would suggest to eat raw vegetables or eat a carrot that has just been dug up from earth seconds ago. Agreed. But then, there should also be something that will taste as fresh as nature even after cooking. Words are lost in translation and similarly, flavors are lost during cooking. The final palatable dish is a conjuncture of new flavors and not the initial and most of the times we never complain, because that is what we want! Palak Paneer is one subtle item where you want the initial flavor to remain and not get a different modified taste. When you eat a mouth full of palak paneer, you should realize the taste of "green" and the taste of "milk" and there should be nothing else gaudy. There should be no oil oozing out, there should be no spice dominance, it should be green, lush and smooth.
Too many rules eh?! The fascinating fact about cooking palak paneer is, just keep the procedure simple to attain the best result. There is no strain, no hurry. But there needs to be the willingness to get it right.A little science, frying in oil will result in change in flavor and color. And a little irony, oil has to be used anyways!

Clean the fresh palak leaves (Blatt spinat in German) and remove the thick stems. Boil water in a huge vessel and add the uncut leaves to it (remember, add only when the water is boiling). The leaves will get cooked in just over 3 minutes. Drain the water and transfer the cooked leaves to a blender. Don't start blending yet.
Heat just a tablespoon of oil in a pan and saute finely chopped onions, just one small garlic and a similarly sized ginger. Add chopped green chili to this if a little hotness is required. Once the onions are sublime, transfer the contents to the blender and blend along with the spinach to a very fine smooth consistency. Keep aside.

To a cup of water, add cumin powder, coriander powder, a little red chili powder and a drop of turmeric. Mix well, keep it watery and not make into a paste. Heat a little more than half a teaspoon of oil in a pan. Add into it broken cloves(2), slit cardamom(2) and very little cinnamon. Now add the cumin+coriander+chili water into this and allow to cook on medium heat. Add some hand crushed dried kasoori methi (fenugreek) to this. Now transfer the blended spinach mixture into this, wash the blender with little milk to transfer the still sticking spinach. Never increase the heat beyond medium, the slower the cooking, the better. Add fresh cubes of paneer (cottage cheese) into this and allow simmer for a few minutes before taking it off the heat.

More than the do's, there are many do not's in cooking this! Well, experimentalists can always ignore these, but a perfectionist can appreciate. Do not add fried paneer cubes. Do not fry the spice powders directly in oil. Do not use more than few pieces of whole spices. Do not over load garlic. Do not add cashews and raisins. Do not add mint leaves and tomatoes. Oh, and in case I have failed to mention, palak paneer should be green!

Thursday, September 23, 2010

Put pressure on the basics, Pongal!

"machi ,here's a blog request machi. hope you are back in shape now and feeling better. since you are still at home, why don't you ask your mom to make pongal and you take pics of that and write a combined blog with your mom!! . i was looking at some recipes online and most of them seem to mess it up like mad. i was thinking of your simple recipe which is super effective. guess these guys don't know what pongal is !!"
                                 - Vivek , 4th September 2010

When I read this mail, I was thinking, how can someone mess up Pongal?! It is one of the easiest traditional breakfast a person can make. Ven Pongal derives its taste and nutritive value from the simple ingredients that go into it and it is best served as a hot steaming breakfast. Even when I am writing this, my visualization takes me to my college canteen where Pongal is served, just the way it should be, with sambar and coconut chutney.

Pongal is one recipe that also depends on "kai manam" or the hand that cooks it. It will taste differently even when cooked with the same ingredients but with a different pair of hands. There is no quantization of the ratios and each person can adapt what his tongue likes. So my recipe is going to be more specific to how I like my pongal and of course which has won the hearts of several people!

Add just one table spoon of ghee (clarified butter) to the pressure cooker. Fry a few cashews until then are golden brown and then add whole black pepper. Add cumin seeds, finely chopped ginger and fresh curry leaves. A pinch of hing and turmeric powder can be added now. Add in 2 cups of rice and half a cup of moong dhal into this and mix well. Add 2 cups of water more than how much the rice will usually consume. That is to say, 8 cups if you use raw rice, 6 cups if you will use basmathi. Add salt and pressure cook until done. Serve with sambar or gotsu and coconut chutney.

After opening the pressure cooker, top up with another spoon on ghee and mix well. Too much of ghee will make the pongal unpalatable and no one wants to sleep right after breakfast! Adding chopped green chili is not advisable at all, it is not pongal anymore! Vary the levels of pepper and ginger to attain different levels of spiciness. Make sure that the rice and lentils get blended well when you cook it. Pongal is smooth, the rice should not be like how is it in vegetable rice. If you are going to make it in an open vessel, then to boiling water, add chopped ginger, black pepper, curry leaves, cumin, hing, turmeric, salt, rice and lentils. Finally when the rice and lentils are cooked, add cashews roasted in a little excess of ghee and mix well. Only in this sequence you will ensure that the rice and lentils gets cooked well. With the pressure cooker, things are different, quick and you can afford to be lazy!

Wednesday, September 1, 2010

The kissable garlic : Aglio oilo


I was making spaghetti for dinner and I told Prashanth and Ramki “machis, tomorrow you are going to eat spaghetti in Italy. So don’t complain there that it is not as good as my preparation!” and that is exactly what happened. Probably it was just my luck that that particular restaurant in Venice did not serve us well, but as soon as Prashanth uttered those words, we could not stop laughing.

Many people would not eat garlic just because it would impart mouth odor and make it difficult to socialize. But when deep fried, garlic does not impose this restriction. And I am a huge fan of garlic! Who cares if the mouth is going to smell, I cannot restrain myself from garlic fried in ghee or when put in rasam. Me and my sister used to fight over who will get the extra garlic after amma has partitioned and rationed it out for us!

Aglio oilo is a basic simple spaghetti recipe that I would term as the kissable garlic. This is one of my most favorite non creamy and non gravy based spaghetti that can be enjoyed for its pure flavor of garlic and chili without interference from oregano or any other expressive seasoning. I love the olive oily feeling all around my mouth when I eat this.

Heat just a little excess of good olive oil in a pan. Fry finely chopped garlic until it is fried well. Add coarsely ground deseeded green chili paste into this. Toss in a few pieces of red bell pepper or minced celery or both. The red bell pepper and celery are just very optional for people who like some extra vegetables in their plate. Now add the well cooked and strained spaghetti into this and stir. Add salt and sprinkle just a dash of black pepper powder. Mix well so that every spaghetti strand is bathed in olive oil and the garlic pieces are spread well into them. Serve hot with an optional garnish of grated or powdered cheese.

Note: Add at least 5-6 huge pods of garlic. Chop it as finely as possible, but don’t make a paste out of it. Chili can be added as per your levels. 2-3 should be optimum.


Tuesday, August 31, 2010

The magic of fermentation: Sauerkraut


I can never stand this statement “oh, finding food abroad is so difficult, how do you manage? Have you started to eat meat?” Give it a rest dear people. Finding food is easy when you first find your tongue. Keep an open mind to relish and approach new food and flavors. Don’t be suspicious about food. The very first touch down on your tongue is going to tell you the taste and until that time, be with an open mind. And it is always polite to tell, “I do not like how it tastes” rather than spitting out and yelling “It tastes terrible or it is the worst dish.” No one is going to cook and present something that is terrible, well, unless you have displeased your wife!

Tastes can be unique, divine, smooth, spicy, heavenly, elevating and the list can just keep continuing how your mind is going to perceive it. One persons like can be another persons dislike when it comes to taste and there is yet another category called acquired taste. I feel sauerkraut would, for me, fall under this category.

Sauerkraut is the most common food you would come across when living in or traveling Europe. Most popular in Germany, Poland and Bulgaria and served almost with every other form of food, Sauerkraut forms an essential part of lunch. To put in simple language, Sauerkraut is nothing but fermented cabbage. The lactobacilli bacteria acts upon the cabbage and ferments it naturally turning it into this very healthy sauerkraut and as the name suggests, it is a little sour. It is abundant is vitamin C when consumed raw and can be added in salads.

Remove the first few leaves from cabbage. Do not wash the cabbage. Finely shred it and put into a food grade plastic vessel. Do not use the cabbage stems for they would spoil the smoothness of the sauerkraut. Pack the shredded layer of cabbage tightly and sprinkle rock salt. One handful of rock salt should be sufficient for one cabbage. Allow it to stand for sometime. The salt will cause the cabbage to water out. Now take a plate that can just fit into the vessel and press down on the cabbage until the water accumulates on top of the plate leaving the cabbage beneath the plate. Allow this to stand for 3 days. This might take more time in European countries but in India, 3-4 days should just be fine. Remove the liquid from the top before taking out the sauerkraut and if you want to store it for more days after removing some, then after placing the lid back on, pour the same liquid over. If you find some moulds growing, do not panic, just scoop them out. You will get a fermented smell which is distinct of the sauerkraut. Before adding the salt you can add cumin seeds or fennel seeds to impart a slight flavor to the sauerkraut.

Add this raw to salads or cook it well in a pressure cooker. The cooked sauerkraut can be an excellent accompaniment to boiled/smashed potatoes. Further more, sauerkraut can be used as a filling in number of dishes.

Note: The cabbage will turn mild translucent upon fermentation. The sauerkraut can also be taken out and used when it is just half fermented. This is referred to as fresh sauerkraut and makes an excellent salad. It is also advisable to place a heavy weight over the lid so that the cabbages are pressed down further away from the liquid on top. Wrap the weight in a plastic cover to avoid any contamination.


Pure Polish, Pierogi


Discovering new food for my tongue is always the exciting part of every tour I make and I take time to sit on the internet just to do research on the traditional food and find out the vegetarian options available. Before my trip to Krakow, Poland, I could interact with two Polish friends who guided me to Polish food that I have eventually fallen in love with. I was blessed in two ways. One, I could find out the exact restaurant they suggested and they served awesome Peirogi and two, I was able to relish proper home made Peirogi prepared in the traditional way. When I first told my friends that I ate Pierogi with potato fillings they stuck their tongue out and mocked that it was Ruskie and not traditional and then when I told them about the sauerkraut filling, they accepted me into the league of Pierogi lovers.

Pierogi is the first Polish fascination I am going to write about and then later follow this up with another wonder as soon as I cook it. The day I ate Pierogi, it was Vinayakar chaturthi and it felt like I was not missing the kozhakattais. Well, this is a very crude comparison just with respect to how it looks! Then when I described it to amma, she reminded me of the Chinese kozhakatais (well, she invented this name) she used to make. But yet again it would be blasphemous to compare Pierogi with this, even though the outer layer is the same. And oh, this is the egg less version!

First a dough needs to be made with all purpose flour. Make the dough with dilute milk, salt and a small pinch of sugar. Egg lovers can add in one yellow into this and Vegans can just ignore it and proceed. Once the dough is made, make small Chapattis with it, 3 inches in diameter. Thanks to Amma and sister for this effort for without them my Pierogis would have lost shape!

Be creative with the fillings. But here is the traditional one. Saute sauerkraut (a separate blog is coming up on this), finely chopped onions and finely chopped mushrooms. Use very little oil to sauté them and add some cumin seeds and a dash of pepper after all these vegetables have been added. Cook them well and add salt, take off the flame and then add finely grated cheese. Mix well. The cheese will melt mildly and make the filling thick. You can ignore the cheese and substitute the sauerkraut with finely shredded cabbage. Alternatively you can play around with smashed potatoes and cheese or blue berries and strawberries!

Now place a spoon of this filling in the middle of the 3 inch Chapattis and close it and seal the edges properly. Do not over stuff it, but make it in such a way that it is full and fat and properly sealed. Drop these into hot boiling water in batches and carefully cook them. Melt butter in a skillet and sauté these boiled Pierogis in this. Do not fry them too deeply but just until you start to see the fry patterns appearing. Garnish with roasted onions!


Sunday, August 15, 2010

Flowery delight: Cauliflower manchurian a.k.a Manjaree

Here is yet another dish that held my fantasy for a long time. Amma forbade ordering this in the restaurants because she feared that they would be too lazy to clean the cauliflower and the food might contain worms. Every time amma used to make cauli, she would remove those slimy squiggly green fellows and so very rarely ordered gobi manchurian (gm). I consider this gm as the finest collobration between India and China.

My college canteen spoiled me with this dish. We used to call it Manjaree. "Anna, one plate manjaree. Ozhunga parthu samachaduthanae? (properly cooked right?)" used to be our order line every time. Ramamurthy mama would always give a friendly tap for this question and assure us that he would bear the medical expenses if anything happened to us because of his food. Nothing has ever happened!

Gm could be a dry starter or made into a gravy to accompany fried rice or fulkas (my fav combos) and other combinations will also be fabulous anyways! Combinations are a seperate blog and I know so many people, including me, relishing certain combos that could be just un thinkable!

Cut the cauliflower into nice florets, wash them well and dry. Cut onions, capsicum and green chili into big pieces. Separate the onion as big leaves after it is cut. Sprinkle vinegar over this onion-capsicum-green chili mixture and set aside. Make a thin batter with all purpose flour adding along coriander powder, cumin powder, red chili powder, ginger garlic paste and salt. Don't make the batter as thick as for making bajji or pakodas. Make it in such a consistency that it will coat your cauliflower and not create an envelope for it. Dip the cauliflower florets into this batter and fry them crisp. Set aside and seriously fight the temptation to eat them before the procedure is complete!

Fry finely chopped onions with ginger and garlic pieces in little oil. Add chili sauce and soy sauce into this. You can additionally add sweet-sour sauce too and I usually substitute the chili sauce with the Thai version of seasoned red chili vinegar called Sambal Olek ( thanks to Sharan for introducing me to it ). Now add the marinated onion-capsicum-green chili after draining the excess vinegar off into this and give it a stir. Add the fried cauliflower florets and toss your pan a couple of times to aid good mixing. Now add finely chopped spring onions and toss again. If you are not comfortable with tossing, then carefully stir to mix well. The dry manchurian is ready!

To make the gravy version, we need not do the marination step. Instead these cut vegetables can be added before adding the sauces and cooked along. Once the sauces are added, add water and cook on low heat. Starch solution or corn flour solution can be added to thicken the gravy. When the gravy is thick, add the fried florets and simmer for a few minutes before garnishing with coriander leaves.

My personal advise, dry version is the best! If you notices, Gm does not contain any garam masala though you can experiment sprinkling some. The sauces play the most crucial role in bringing out the Chinese taste. Also, carefully add salt to this dish because the sauces will already contain salt.


Guru Batik to Aang, Banana curry soup!

You read it right! It is a soup made with bananas. I am a huge fan of the Avatar series, No, not the hollywood movie made by Cameroon, but the original cartoon series that has now been made into a movie by Manoj.
Aang drinks up a juice given to him by Guru Batik and exclaims that it tastes like onion-banana juice. Before I could see the expression on Aangs face, my face went into a twisted contortion and a repulsion for a taste I have never experienced. I just could not imagine this combination and thought that it was cartoony fun.
One day in the mensa, the menu read, banana curry soup : 60 cents. This is not huge money to experiment with an un-experienced taste and when I tasted it, I had to go back for two refills. To put it in Aangs perspective, it sure will help gain spiritual highness!

There are not many convincing recipes about this Estonian soup on the internet and so my curiosity drove me to ask dear Frau Fidan Batman about this. And then I cooked this the very evening for dinner.

Take a vessel and add cut bananas into it. Add water just enough to submerge the bananas and let it boil until the bananas are cooked. Saute finely chopped onions in butter along with a very small piece of garlic and an equally sized ginger. Once the onions are translucent, sprinkle curry powder (coriander, cumin, fennel, pepper, cinnamon, paprika and turmeric) and salt. Transfer into blender along with the boiled bananas and blend until very smooth. Transfer back into vessel and bring to required consistency with water. Cook on low heat and finish off with cream. Before serving, in the cup, add few pieces of unsalted banana chips into the soup.

* picture to be uploaded soon
* the curry powder is not our usual Indian curry powder!


Wednesday, August 11, 2010

Dai ... Dai... todays menu, Masala VaDai !!

This is an item than can instantly create a mouth water and any number of vadai´s you consume, you will always be left wanting for more and more! And the best masala vadai is always got in the street shops. I remember Appa used to buy this delicacy from a shop near Appar swami koil. The shop opens at 4pm and the vadais are already sold out by 5pm. For 1 Rupee, one can get 2 vadais wrapped in an old Hindu or Dhinamani or Anantha Vikatan. Also in the train journeys, the vadai used to be so tempting. The entire bogie would be automatized but Amma would never allow purchase fearing hygene factor. I should confess that during my lone trips to Bombay, masala vadi always accompanied Ayn Rand!

The first time I made this in Germany was for 2008 Christmas party and it was finished the very second I presented it. Lentil cake with spice was how I advertised it. What is in a name when the aroma and the taste are going to dominate?! Yet again, here is an item that is juiced with cinnamon and fennel.

Soak the channa dhal for at least 40 minutes. Drain the water completely and transfer into mixer. Add one pod of garlic, an equal size of ginger, few cinnamon sticks and salt. Grind coarsely. Add whole red chili and give it a few more spins with resting time in between so that it does not become a batter, but remains coarse. Add little water if it is very dry. Transfer to a bowl and add lots of chopped onions, fennel seeds, curry leaves and coriander leaves. Mix well. Roll into medium balls and press between the palms to obtain the vadai shape. If the batter doesn't hold, don't add water into it! Just sprinkle some besan (channa dal powder, kadalai mavu) and mix well. Fry in oil at medium heat until cooked. Serve along with hot tea!

Last Sunday, 8.8.2010, I went to Tez`s house to make this. Making Masal vadai for 6 grown ups is not ordinary feat I say and I get high when my friends eat it and their expression tells it all. Prakash could not keep away from the kitchen. So I gave him the first vadai for taste. After relishing it, he stole yet another and ran away just like a kid! Who can resist it?!

I am awaiting pictures taken by Yathi. Once they are in my inbox, they will be in my post.

Friday, August 6, 2010

Saluting Aphrodite:Tzatziki ; First steps into Greek cuisine

The Greek mythology has always fascinated me. The world of Gods, just like our own mythology has much to offer for knowledge and fascination. It is my dream to visit the Islands of Greece one day to satisfy my hunger for history, art,mythology and food! In fact, in ever country I set my foot on, I try to learn about the traditional food and taste as much as the vegetarian plate has to offer. There have been some quite huge bills because of this and I don't regret any one of them, with just Venice being an exception. I will write a separate blog on this issue soon!

Tyatziki is a simple introduction to the Greek cuisine. It is a dip that can be had with variety of items, the non vegetarian list being bigger than the vegetarian one. My suggestions for this dip would be just about anything starting from Samosas, pakodas, masala vadai, bajji, baturas, naan, grilled vegetables, spicy rice variates and cutlets.  Or just dip your finger in and keep eating it! To simply define it in terms of known items, Tzatziki is the Greek alternative for Raita!

The main ingredient required is thick thick curd. Suspend curd in muslin cloth overnight and use the condensed yogurt. Peel cucumber, remove the seeds and grate them. Squeeze them dry. Add this to the curd(200gms). Finely mince 2 big pods of garlic (use a garlic press for best results) and add. Next goes in finely chopped Dill (5 leaves), salt, white pepper powder( a table spoon), 2 table spoons of extra virgin olive oil and 2 table spoons of lemon juice. Mix well and the dip is ready! It is a very healthy dip too and stays up to to one week in the fridge!


Thursday, August 5, 2010

Unconventional combinations: potatoes in yogurt

There are times when people get bored with conventions and want to try something new. Some people are a bit too energetic just to try something new, but they invent something new! Out of one desperate energetic situation there arose a recipe which carries no name so I simply put them as potatoes in yogurt. There might be recipes similar to this one or may be even the same one which has a name to it, but for me, this one just happened in the kitchen in-situ!

As I have described before in my Mor Kuzhambu blog, yogurt or buttermilk is going to reflect the spices that we add in and that is what exactly happens here and yet another happy thing I like about this particular recipe is that it contains specifically self tailored spice mix. To get into details of what made me choose these ingredients for the masala would be a very tough one to answer. Impulse? Or may be a voice from within guiding my hands to pick up just these dear fellows? Or I could have just got lucky!

Dry roast half a stick of cinnamon, 2 cloves,  half a table spoon of cumin, one spoon of dhaniya seeds, 2 or 3 red chilies and 10 whole black pepper. Roast until you feel the room being filled with the aroma or if you have a cold while cooking this, just keep an eye until the cumin or dhania starts turning brown! Transfer them to a blender and make it into a fine powder. The dhaniya and the pepper tend to dominate the flavor but still the cinnamon and cloves do not get totally suppressed. I am sure many people will find this combination interesting.

Chop onions (how much ever you want to!) very fine and add it to just melted butter in a cooking pot that can be closed. Stir the onions and add into it boiled and peeled baby potatoes (80% boiled). Add turmeric, salt and the ground spices and top it with just a scoop of butter. Close the lid and shake well to mix and allow to cook on low heat. Allow the onions and the potatoes to get cooked in the butter. Keep shaking the vessel slowly so that the bottom does not burn and to allow all the potatoes to get well coated. Once this is done, add thick whipped yogurt and stir softly. Allow to simmer, closed on a very low heat for 3-4 minutes. Garnish! Eat with rice or rotis!

And then Rp said, let there be taste!


Wednesday, August 4, 2010

My first Italian love, vegetarian Bolognese

I didnt know the difference between Spaghetti, Pasta, Penne, Macaroni, Linguine and Noodles. Yeah, the first time I made noodles by boiling it and adding the pre packaged masala, I thought I made spaghetti and it was Italian. And then my knowledge bank grew and learnt the noodles is Chinese! And when I first ate spaghetti, I thought it was a modified version of the Chinese noodles. Years have passed and I have matured!

I landed in Germany on a Wednesday and it was pommes (french fries) day in my mensa (canteen). Come the first Monday and I asked the serving lady (Frau Fidan Batman) what was the menu for vegetarians and she told me that they have spaghetti with vegetarian variant of Bolognese sauce. Though it looked suspicious to me at first, I trusted the dear old lady and took it and she served it to me with a topping of powdered cheese. I never knew how to eat it and spilled quite some on my shirt and felt embarrassed about it and after coming to lab, I googled on how to eat spaghetti with the fork and spoon! I fell in love with this bolognese the very first time and asked the Germans what their version contained. It was minced meat and then I went to the canteen people and asked them about my bolognese and they assured me that it was just vegetables! 

As a curious connoisseur, I always want to cook what I relish and after years, I ventured into cooking Italian masterpieces and the first one was Bolognese. It originated in the beautiful city of Bologna in Italy and is listed as the most favourable and delicious spaghetti topping. I had a hard time finding the right recipe and so I went to the Italian restaurant near my house and found out from the chef his secret. The funny part was that, I did not eat in that restaurant. It is a heavy budget one for a student and so I told them that it is just to satisfy my curiosity and they bought it looking at my innocent face!

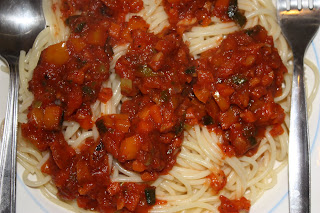
Finely mince carrots, mushrooms, onions and celery. The finer your cut them, the better the sauce will be. Heat olive oil and add the cut vegetables into them, all at one go. When they are sauted well, add little concentrated tomato paste and mix. This is the right time to add salt and freshly grounded pepper and a sprinkle of nutmeg powder. Stir and add 150ml of dry white wine and allow it to boil until the wine nearly evaporates. Now add in as much of tomato puree you want to and cook for at least 30 minutes on low heat.
Traditionally this sauce does not contain oregano, but a little flavour will not harm it. Italian prefer this with pasta, but I prefer this with spaghetti and garnished with generous amounts of cheese!

This is a picture of my first bolognese preparation. Appa was the first to taste it here in Germany! I am going to cook it tomorrow and will post the updated one soon!


When Deutchland went ole ole ole, I went chole chole chole!

Trusting my memory, I can say that this has been the dish of my life until now. It was the first north Indian dish I got introduced to and the most relished too. There was a chat corner near Vitan. Where Rex fashions stands now, previously was a ladies garments outlet and Vitan was spread into three huge sections, the basement with groceries, a fancy store and one huge floor with toys. I just couldnt stop remembering all this. Near Vitan, stood this chat corner which was managed by a Mallu family. It was the source of Chole or Channa masala for us. I remember the countless days I have taken a pathiram (vessel) from home to take home the chole. We never liked packing the hot stuff in polythene. Invariably any amount that was bought was never sufficient and Amma and Appa had to always part from their shares to satisfy the hungry looking eyes of their two little foodies. Never without a scold though!

When Amma started making this at home, she would first serve me the boiled channa with excess of the water in which it was boiled in. It tastes divine. Maximum of 10 channas in a cup of the hot protein extract. It was the method to stop me nagging her when she was cooking and I never complained because I just love the channa water soup! And yes, I was very choosy about the type of channa used. For me, it has to be the white channa (chick peas or garbanzo) and never used to like the brown (coated) ones. 

Yet another fascinating thing about this channa masala is that it goes well with just about anything. Be it pulao or just steamed rice, naan, roti, poori, samosa, cutlets and imaginations extended. Just fill a bowl with hot chole with raw onion garnish and eat, it is still fantastic. I also feel that channa masala is one of those dishes that can be made in variety of way and every method can be as tasty as the other. What ever the method is going to be, the spices added into this can still remain a constant. My channa masala consists of the following: coriander powder, cumin powder, chili powder, turmeric powder, amchur powder, pomegranate seed powder and a slight hint of pepper.

I am now going to put forth three methods that I follow to make channa masala is different tastes. They are only mind variants, but will make quite a difference to the taste. The first one is the ever conventional way. After spluttering whole garam masala (cloves, cinnamon, cardamom and bay leaf), finely chopped onions (with chopped garlic and ginger) are sauted and finely chopped tomatoes are added to this. Right after the addition of tomatoes, the channa masala mix (the one mentioned in the above paragraph) is added and allowed to cook well until the tomatoes and onions become a gravy and till the oil separates. Now, the boiled channa is added into this and water is adjusted according to preferred consistency and the cooking vessel is closed for a few minutes to allows the channa to swim and get adjusted to the spicy environment. 
Variant two is to add fresh cream at this stage and then garnish. For variant three, before adding the channa into the spicy onion-tomato gravy, well beaten curd is added and to this yogurt gravy, the channa is added and allowed to simmer for a few minutes. Garnish with your imagination, coriander leaves and raw onions.
The channa masala without cream or yogurt can receive an additional garnish with fresh lemon juice.

The picture below is the usual chole. I will add pictures of other variants soon!
*written from i pod when traveling from Düsseldof to Mülheim!


Tuesday, August 3, 2010

A spicy sinful indulgance, Kurma, as I do it !

This could be called as kurma, but I prefer to call it vegetables in spicy cashew coconut gravy. I used to cook this for every party and my friends here just love it so very much. I tried to find a picture of this to upload but I didnt have the habit of taking pictures until recently and since now there arnt any more Indians in my town, I have nearly stopped making this. The very first dish that bore my trademark and made me a famous person in this little town of Mülheim.

I am huge vegetable fan and there is not a single vegetable that is not delectable to my taste buds and this particular facts makes me cook dishes that have multiple vegetables involved. The craze for vegetables starts from purchasing them, in cutting them and eating them raw whilst cooking. I should mention here that I have different knifes for these purposes and thank Herr Saroj Panda for gifting me with a single piece steel knife that is a collectable for life. An authentic German make, Nirosta, worth nearly 50 Euros. I use this to cut potatoes, beetroot, nholkhol and similar vegetables. For onions and tomatoes it is my pure white non stick nano carbon coated non stick knife from Zassenhaus, for cabbage and fine mincing, it is the Edelstahl and for fruits and hand held cutting, Cartini. 


I also love to conjure up my own spice mix for the dishes. Using garam masala powder that is readily available is limited to everyday cooking and self one pot laziness. Especially in this particular dish, it is just an imaginative expression of spices. An ode to spices I should say!

Potatoes, carrots, beetroot, nholkhol and beans. All cut into similar sizes, big or small according to the mood of the day or the feel of the moment are steam cooked until just done. The water used for cooking is transferred in to a pan, heated with a dash of pepper and some salt and transferred to a bowl to be drank as soup while cooking the kurma! Salt is added to the boiled vegetables, shaken, and kept aside. Finely chopped onions are sauted in butter and to this is added the spice mix. Cinnamon, cardamom, cloves, annas flower, marathi moggu and a dash of poppy seeds are powdered well in the mixie and to this powder, soaked cashew is added and this paste is added to the onions and cooked. Red chili powder can be added at this stage along with a sprinkle of turmeric. Add a little water to aid the cooking of the cashews and not to burn this congress. Once this is cooked, the boiled vegetables are added and stirred carefully without smashing them. This is why it is important not to steam cook them to totality. Finally, coconut milk is added and the heat is turned off. Let it stay in the heat for sometime and finally garnish with chopped coriander leaves.

I do not add ginger and garlic to this nor do I use a single drop of oil. See, healthy and semi aacharam :P
Eat this with hot poori and oh, be warned, your house will smell of spices for days after cooking this!


I bow down to the almighty : Thachi mammu a.k.a curd rice !

Throw money around, make the impossible happen, pull strings and work through connections or just hire the best cook or even better, go to the best restaurant. All these are going to make special things simple. Life is not always about how special things are made simple, it is about how simple things are made special. The curd rice stands unmatched in simplicity and it is also the uncut stone waiting to be sculptured into the most glamorous statue.

Good food always brings happiness and a for meal to be complete, it must end with the curd rice. Hail south Indians for this practice! Well cooked rice is mixed with curd with a dash of salt. Simple, quick and needs no brilliance. Best suited for hot afternoons and the best way to experience your favorite pickle or the left over vatha kuzhambu or the sambar. Countless times my curd rice volcano has been filled with hot vatha kuzhambu and it erupts as fulfillment with every mouth and countless times I have had curd rice only for the reason that I cannot miss the pickle.

There are days when I come home from lab and need something special and at the same time traditional and packable for next days lunch. What could be better than making some special curd rice and letting the milk that has been added with the curd to curdle along with the juices of green chili and ginger imbued within? This is exactly what I mean by making simple things special. I remember that when I once wanted to order special curd rice in the restaurant, Appa was totally against it. He said that if I wanted to eat curd rice, I should have had it home! Agreed, but sometimes you never know where temptations originate from!

Basmathi rice has become an integral part of my life here. It was easy for me to buy it in the German supermarkets and cheaper as 5 Kg bags in the Srilankan stores. And being a student when I get Basmathi at 11 E against 15 E for our normal rice, why would I say no?! And using basmathi to make this curd rice is like using a 100 % pure solvent for my experiments! After cooking it with a little extra amount of water to make it more soft, I pop mustard seeds in oil, roast channa dhal, urad dhal, curry leaves, green chili and minced ginger and add this into the rice. I follow this order because I want my curry leaves to be crisp but at the same time I don't want green chili and ginger to be fried. After sprinkling salt, I allow it to get cooled for a few minutes before pouring in chilled milk. Never the 1.5 % low fat or skimmed stuff. No compromise no taste, no, definitely not in this! So the best milk goes into this. Then the curd. I make sure I have stock of curd from the Turkish shops when I want to make this. The Turkish curd tastes exactly like "aathu tachi" (home made curd) and gives me a sense of home. Finely chopped dhaniya leaves/stems also go into this and when I mix this, I make sure the green chili and ginger gets crushed and the juices are out. 

Want this extra special?! Sprinkle shredded coconut, carrot, cucumber, raw mango pieces, raisins and pomegranate . Will the glamorous statue say NO to ornaments?!

Monday, August 2, 2010

Heinemann, even betrayal is just !

I was contemplating where to post this one, here or in my experience blogs and finally decided that, its food and it belongs here! I would have never know about Heinemann. Even after 3 years in dear old Mülheim and weekends after weekends in romantic old Düsseldorf, I could have never discovered this gateway to bliss. Thanks to Tez and his policy on the "local" brands. Heinemann is a konditorei (cake shop) in the ever effervescent Alt Stadt, just opposite to the Shadow Arkaden. My first visit there was on a Saturday afternoon and thankfully on an empty stomach. I have never smelled divinity before and now I know I can, but only in Heinemann. The entire place is like a freshly baked cake. Did I say cake?! Well, its the basic lingo everyone knows. But its just not a cake, but pastries, souffles, tortes, truffles, ruffles and many unheard but worth dying for items. I tasted the champagne torte. The softest cake, with the softest cream, with the softest layer of chocolate and lased with strong champagne. I could not pick and hold the cake without crumpling it. Fingers just slide into it and it melts in the mouth and before you realize, you are either holding the second piece or left yearning for more. Why to people refer to food as finger smacking or lip smacking? one would realise it just after you have had a mouthful. I could not stop talking about this marvel for days and weeks.

I was traveling back with Paprika from Aachen. He had to receive his friends from the Düsseldorf airport at 1.45 PM. The train was nearing Benrath, 10 minutes away from Düsseldorf when I chose to tell him about Heinemann. Paprika stopped me just after the description and told me that I have to take him there now. His train to the airport was at 2.07PM, we were scheduled to reach Düsseldorf at 1.28 PM and the flight lands at 1.45PM. It was the first time for his friends to Germany and it was essential that he was there to receive them. I told him that it would take at least 10 minutes with the metro to get to the cake shop and he would for sure miss the train and keep his friends waiting. Your description has already made me crave for the cake and I am ready to make my friends wait in an unknown country for an unknown period of time for an unknown taste. So, just take me there!  I reasoned with him and promised him that I would get the cake for him the next time. He agreed but was unhappy.

When the train pulled into the station, I make a quick move and dragged him out to the metro. Well, the truth is that I couldn't resist the thought of not going to Heinemann and it was anyway his friends. Luckily the metro came in the next minute and we reached the stop in 3 minutes and ran to the shop and made the purchase and ran back to the metro and back to the main station already at 1.52 PM. He had to catch his train in the next few minutes and mine was in the next 5 minutes. All the rush lay forgotten when I bit into the pastry. Time didn't exist at all. Every swallow down was taking place at its own pace and it pacing up just to catch the next train seemed unimportant. We didn't realise that the entire population in the station was staring at us, two Indian guys relishing a piece of heaven with their faces covered in cream! Who cares, its Heinemann! Fortunately we made it to our respective trains.

The flight was nearly an hour late and my train started 30 minutes later. It was like Heinemann wanted us to relish the cake more peacefully! But every sweat and every rush we had was totally worth it!
And dear Iyengar bakery, you will always be my favourite :-)


Thursday, July 22, 2010

Audition for tradition, Mor Kuzhambu

Be it pumpkin, okra, brinjal, banana, banana stem, sepankezhangu (colocasia) and the list can keep extending! Mor kuzhambu has been the standard for tradition and it can accept any of the vegetables, although when you prepare it for rituals, you restrict the list to only a very few. My heart favorite has always been okra and pumpkin. Though colocasia is irresistible to me and my family in any form, generally it is devoured roasted. However, adding it in Mor kuzhambu is also good. A few weeks back, I made mor kuzhambu with colocasia.

My feelings associated with this particular dish are a bit funny! No doubt I always enjoyed it when amma makes it and every time she would conjure up a new flavor. The buttermilk is like a base, it will just reflect the taste of the spices one is going to use. So, any slight modification will result in a different taste. A slight excess in cumin or coriander or a spirited use of pepper or using them with or without roasting can all be detected even when it is under preparation! I never knew how to make it and once I asked amma over skype the procedure and she patiently explained it to me and when I tried to make it, I over boiled the butter milk and lost the consistency and all I did was to fish out the okra from it and eat! After that I didnt not attempt to make it for a long time and decided that my wife needs to know how to make excellent mor kuzhambu!

After that it was Vasu who tempted me again with her excellent preparation and then I watched her make it and learnt the nuances. Soaking toor dhal for 30 minutes is the first step. Then dry roasting red chilis, few coriander seeds and few cumin seeds is an important and careful step. Some people soak the cumin and coriander along with the dhal, but I prefer this roasting. Once carefully roaster, it is blended with the dhal along with luscious amounts of fresh shredded coconut. After spluttering mustard seeds in coconut oil, turmeric and hing are added. If it is going to be okra, then this is the right time to add it and fry it a little. If pumpkin, then add water, add cut pieces of pumpkin and let it boil for few minutes before adding inside the ground dhal mixture. Since I made it with colocasia, I had already pre boiled it and peeled it. So, after cooking the dhal, it was addition of colocosia into that and adding the right amount of salt. Finally well beaten butter milk is added and the mixture is allowed to simmer for few minutes. Final garnish is done with lots of coriander leaves and cut green chili fried in coconut oil.


Wednesday, July 21, 2010

Wicket in the first ball, Malai kofta!

Not to get confused with the title, the dish wasnt a failure, it was in fact a huge delight! I used this metaphor for comparison because, the look on the bowlers face when he strikes the wicket in his very first ball, will tell his exhilaration. This was exactly how I felt when my friends masticated the soft kofta and let out a soft moan, wow.

For a long time I have been wanting to cook this. Ever since the first time I ate this in Sangeetha, Mylapore, whenever mom would ask me what to cook, my instantaneous reply would be Malai Kofta. Well, I didnt get it ever time I asked for it, because, if I had, then I would have probably been in rehabilitation for reducing my obesity. It is sure one of the rich dishes. And only when you are seldom exposed to it, the mystery stays intact! 

Malai kofta is not sweet. I dont understand why some restaurants make it sweet. At least my opinion, which Tez also is stubborn about is that, Malai kofta tastes better when it is hot and spicy. After coming to Germany, I have loved this dish at Taj Mahal, Bochum. Every time I enter the restaurant, Jagadeesan know exactly what I would order and he would throw in an extra Batura and raita in for me and say it is on the house. Spicy and hot Malai kofta!!

I steam cooked the vegetables when I was cooking the rice in the electrical cooker. Potatoes, carrots, beans and peas. Then peeled the potatoes and shredded them. Carrot was also shredded, peas added directly and beans was cut into small pieces. The important thing to keep in mind is that, these vegetables should not be over boiled and dripping with water. Excess water can be removed by squeezing them in a muslin cloth, but then, this is for people who overshoot the water limit or over boil or use a pressure cooker to boil the vegetables. So, advises apart, then came the shredding of paneer into this. Not too much, not too less! And then went in chopped green chillies, coriander powder, cumin powder, few raisins and roasted cashew. Of course, the right amount of salt too! It is funny when cooks quantasise ingredients like half table spoon of cumin, one tea spoon of salt and the likes. The best is to feel connected to what you are cooking, then you will by yourself realize the quanta! So, after everything was in, I smashed it together. Even when I was doing this, I knew that the koftas were in the right consistency and would not break up. Vimal was eager to help, so he sat down patiently to make nice kofta balls and roll them in all purpose flour.

When this was getting done, I cooked onions and tomatoes in oil, put them into a blender and made a fine puree. After spluttering whole spices (cloves, cardamom, cinnamon and bay leaves), I added some ginger-garlic paste, followed by the puree and into this puree went in turmeric and red chilli powder. Once I was satisfied that the red chilli powder would have got cooked in the puree, I added thick cream into this. By then, Tez had finished frying the koftas in oil. They were soft and ready to fraternize with the hot malai sauce. In the went and the a few leaves of dhania to commemorate the delicious union! 


Monday, July 5, 2010

Romance, Tiramisu!

First, "dear Mom, I know you were upset when I told you that I am going to make Tiramisu. And yeah, you guessed it right, it does contain eggs. But right from childhood I got used to eating eggs in various forms. Cakes, ice creams and chocolates and it removed my aversion to it. Also, after eating this heavenly dessert at restaurants and authentically in Italy, it is very very difficult to restrain from it. I hope one day you eat this, prepared by me, and give a thumbs up."
 My first encounter with Tiramisu was in Lindau, Germany, 2006. Yeah, it is Italian, but you are seldom exposed to all these when you are in India. For me "Senthil softy" was one of the best and it will still remain so! And here in Germany, European cuisine is prominent. So, on a vegetarian food starved party, Tiramisu came to my rescue. The second time was in Rome and the most recent one was in Venice. And suddenly one day, my dear friend Vasudha sent me an email explaining how to coquere Tiramisu at home. When I read the instuctions, I knew I was going to make it, asap! 

I have a very good foodie with me here, Tez. He shares the same amount of enthusiasm I have for cooking and so we decided to make this a joint venture. Two many cooks spoil the broth is an old saying, but it never spoils when the cooks have the same frequenzy! After a real good game of Badminton, me and Tez went to the market to buy the ingerdients. Fresh eggs(4), Mascarpone cheese(500g), sugar, loeffel biscuits (a.k.a Ladys finger or just Tiramisu biscuits), whiskey, good coffee powder and cocoa powder (which we actually missed).

I was a bit skeptical actually. Eggs, yeah, okies, not an issue. But when I read the instructions, I realised, raw eggs! As I have already said, once you have tasted Tiramisu, its hard to give up. So, I proceeded. First dividing the egg yolk from the white, I added generous amounts of sugar (4 big spoons) into the yellow and beat it until the sugar dissolved. I smelled it several times to make sure it didnt smell raw, it actually did not. This put a smile on my face. When Tez added the mascarpone into this, I was so tempted to eat this mixture. Mascarpone is divine! Few minutes of beating and this became a soft cream. Next is to beat the egg white until it becomes soft and fluffy. Best is to use an electrical whipper, but since we were not equipped with it, it was muscular whipping. After adding the fluffy whipped whites into the creamy beaten yellow-mascarpone, I felt like diving right into the bowl! This mixture was set in the fridge for an hour.

We then made thick espresso coffee and after it cooled down, added the whisky to it and dipped the loeffel biscuits into this mixture and arranged them in a bowl. A layer of the prepared cream on top, and yet another layer of biscuits dipped in coffee-whiskey and then one final layer of cream on top. We didnt have the cocoa powder to sprinkle on top, so with a little sad face and a curse to our memories, we set it in the fridge for 4 hours.


Tez then calls me to my mobile " Machan, my entire house smells of Tiramisu and the taste is better than the ones we get here in Germany. We should sell this da!"

Tiramisu, sounds exotic, tastes divine, not so difficult to make! A perfect dessert for a candle lit romantic evening! Buon appetito !!